As of the past year Glitchet has been one of my favorite parts of the week. It's a mini newsletter that covers all sort of futurism and computer arts thing that I'm interested in. A While back (seven months actually), I contacted the curator of webzine and told him he should do an article on Random Art. I didn't hear back from him until a few days ago.
He asked me if I was willing to write a piece on how it works. Everything was fresh in my mind from my Nim port of Random Art, so I agreed. Over the weekend I came up with this. It gives you a simple overview of how the process works and where these pretty pictures come from. If you don't understand anything, I'm sure you'll be able to grasp something at least.
So I haven't updated it in about 4-5 months. I think that It's time that I get rid of the "hiatus," marker on the side and say that it's officially over. I was planning on covering things like SSL and async Sockets, and maybe exploring some 3rd party libraries. But I think it might be better to say that it's officially over rather than to have this monkey on my back. I have a new job to deal with and my interest in C# has waned a little.
If you would like to, you can read some more details about the conclusion here. For those of you who never knew about it, you can start the course here.
The ride was fun and educational to me as well. Thanks.
It seems like every one to two weeks I've been writing a new package for Nim. I've been playing around with the JavaScript target. There is some basic stuff there in the dom module for HTML manipulation but I noticed something very important was missing; the canvas tag. So well, I added a thin wrapper for it (GitHub mirror). It's available under the html5_canvas package in nimble.
When I first heard about HTML5 and read the spec a little, I think one of the most important things that was added was the canvas tag, and along with it a JavaScript API for all sorts of drawing operations. Interactive content for the web that was being made with technologies like Flash and Java (applets) could now closer to the browser level (and have better performance to boot)!
The only thing is that I don't really like writing JS code; it's my least favorite language out there. But you know we live in a time where you don't have to write JavaScript to write JavaScript anymore! While Nim's JS backend is still marked as experimental I think that its nice enough where we can still make some cool stuff with it.
I tried to keep the API as close as possible to the one listed in the Mozilla docs. Though I did have to make a few changes. One of those in particular are the fillStyle and strokeStyle getters and setters. The problem with these two fields of CanvasRenderingContext2D is that they can be one of any three different types (see here). Nim being a strongly typed language wouldn't let me put those properties right under the type ... object definition. Luckily though there is still a way to keep the API so it looks like we're setting a field instead of having to add a setFillStyle() proc. Taken from the source, look a this:
proc `fillStyle=`*(
  ctx: CanvasRenderingContext2D;
  color: cstring
) {.inline.} =
  {.emit: [ctx, ".fillStyle=", color, ";"].}

# Can do this now!
ctx.fillStyle = rgb(255, 0, 255)
But as for the getters I had to do this:
proc fillStyleColor*(ctx: CanvasRenderingContext2D): cstring {.inline.} =
  {.emit: [result, "=", ctx, ".fillStyle;"].}
There's one for Gradient and one for Pattern as well.
For some extra fun, I ported over my 3D Canvas Cube from Dart (another language that compiles to JS). I've put the source up in my toybox repo. What's also pretty cool is that the compressed JS output from dart2js was about 90 kilobytes, where as Nim's compressed JS is around 20 kilobytes! Originally when when did full imports (i.e. import math) I was getting 124 KB compressed, but when I changed to selective imports (from math import Pi, sin, cos, floor) I was able to drastically reduce the size.
I was able to get the animation to work by adding a mini proc to wrap JS's setTimeout() function:
proc setTimeout(function: proc(); ms: float) =
  {.emit: ["setTimeout(", function, ",", ms, ");"].}
If you're bored with 2D graphics and want to do something 3D in Nim (and in the browser), take a look at stisa's nice WebGL wrapper.
Here is the link to the repo for this again (GitHub mirror). It's also on nimble under html5_canvas. Have fun!
Edit (Jan 30th, 2017): I written an article on how Random Art works. You can read it here.
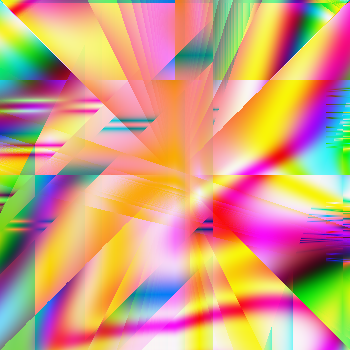
Have you ever heard of Random Art before? If you don't know what it is, the short and skinny is that it's a program that will generate some really stunning images using a randomly generated math equation. That's what the image above was made with. The original program was written by Andrej Bauer. The Random Art website uses an OCaml program that been compiled to JavaScript. Unfortunately the source for that is not publicly posted (which is a shame because it makes some of the best pictures), but a simple Python implement is available. Going off from that, I decided it port it over to Nim and add support for rending with OpenGL (and make a few other changes I see fit).
Well... actually I ported that to C++ (& Qt) first about a year ago, then I did another port over to C# four months later. The C# one was a little more interesting because it was a distributed rendering system leveraging cloud services and RabbitMQ; I ended up using it on a film I was working on. Pretty cool. Those... I don't really feel comfortable sharing the source to right now. But I'll give you a Nim implementation instead. : P
You can find the application over here on GitLab (or GitHub if you prefer it). To compile the thing, your going to need GLFW installed as well. It can run into two modes: CPU bounding rendering and GPU (via OpenGL). There is a lot more info the in the Readme, but here is the usage message:
Usage:
  ./random_art [input] [options..]

  input : a path to an equation file, or provide `stdin` to read input
          from standard input

  Options:
  -r, --renderer : cpu | opengl
                   render on the CPU or with a GPU (using OpenGL)
  -s, --size     : <width>x<height>
                   the dimension of the render, must be a positive int
  -b, --bounds   : <xMin>,<xMax>,<yMin>,<yMax>
                   the bounds to use to render, must be a float
  -o, --output   : <filename>.png
                   the file to save the render as, must end with .png
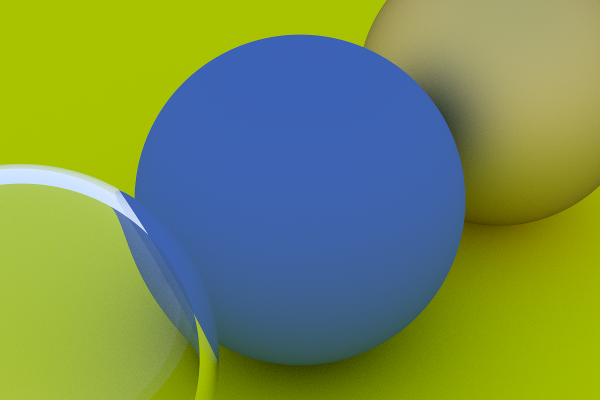
If you run the application without providing an equation, it will think up one for you. Writing your own equations has this Scheme-like syntax. It's pretty easy to understand, but also to parse. The equation below makes the image to the right.
(mul
  (var y)
  (mod
    (sum
      (var x)
      (var y)
    )
    (const 1 0.7 -0.1 0.95)
  )
)
I plan on working on this some more down the road. You can already see some of my changes showing up (e.g. an alpha value). I'll keep you guys posted. Once again, the code is available here (GitHub mirror).
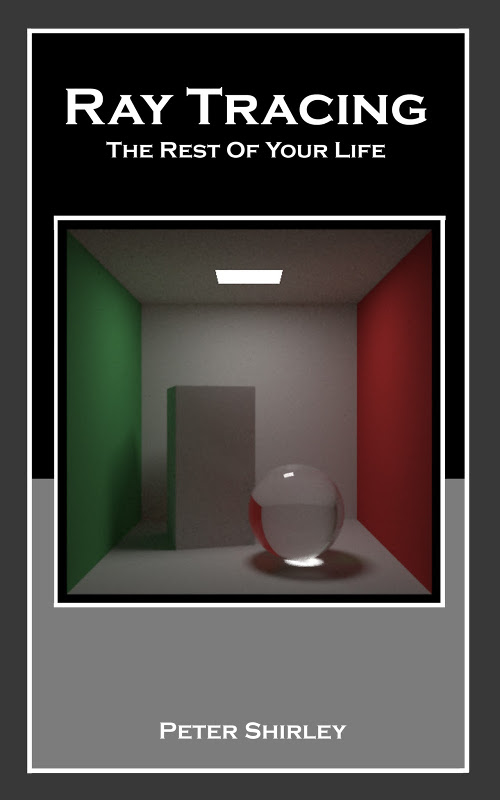
This is going to be a little different than only a usual book review; in fact, it's going to be a review of three books (that were part of a series). They are Peter Shirley's Ray Tracing mini-books. If you've been following my blog for the past few entires you may of noticed that I've been on a bit of a Nim binge lately. I've only been at it for about two months. So in an effort to learn the language better and to go through the books at the same time, I decided to write the book's code in Nim instead of the original C++. It turned out to be smoother than expected (though with some troubles along the way).
What is Nim?
I first heard about this language from the /r/programming subreddit. Every few weeks or so I'd see a link entitled "Nim v0.x.x released," or something like that. I didn't take a look into it until I saw a few of those and said to myself, "Alright, I think it's time to actually take a look at it." Since then, I've been doing most of my free time stuff in Nim.
The best tl;dr I can make to describe Nim would be "It's a python-ish language that compiles down to C/C++." There's definitely a lot more to Nim than just that. Reading from the project site is what really piqued my interests other than the native backend and syntax. There are features that give you a lot of control over the language. For example, you can use constructs such as macros and templates to define your own extensions to the language. One of it's most powerful aspects is how easy it can talk to C/C++ because well, Nim turns into that at the end of the day. Nim is able to take advantage of most of the existing C/C++ libraries with minimal effort. There already exist bindings for things like OpenGL and libSDL. There's even a framework to do web programming too.
I've seen a fair bit of comparisons with Mozilla's Rust and Google's Go, but I don't want to talk about that. The community is not crazy active like many other languages; it's more cozy if anything. Keep in mind that Nim is still very young, yet it's highly impressive what they've been able to do without any massive corporate backing. Yet.
Finding a Ray Tracing Book
It didn't turn out so well for me.
In my last semester of university I took a grad level course in Global Illumination. With the Ray Tracer that I made, I wasn't too happy with the final results. I wanted to give it a second shot. So I headed to Amazon to look for a book. Yes, yes... I know there is a lot of good information out there already free on the Internet, but for some reason I just seem to learn better from reading in a book format. Anyways...
I saw a book called "Ray Tracing in one Weekend," at the top of the search. It caught my eye because:
- It was short
- It was inexpensive, three bucks (that's less than a cup of coffee)
- The code was in C++, and OS independant
- It mad the promise of building a functional Ray Tracer
- It came in a three part series. If I didin't like the first one, I could always ditch the second two books to find something else
I was sold.
Book 1 - Ray Tracing in One Weekend
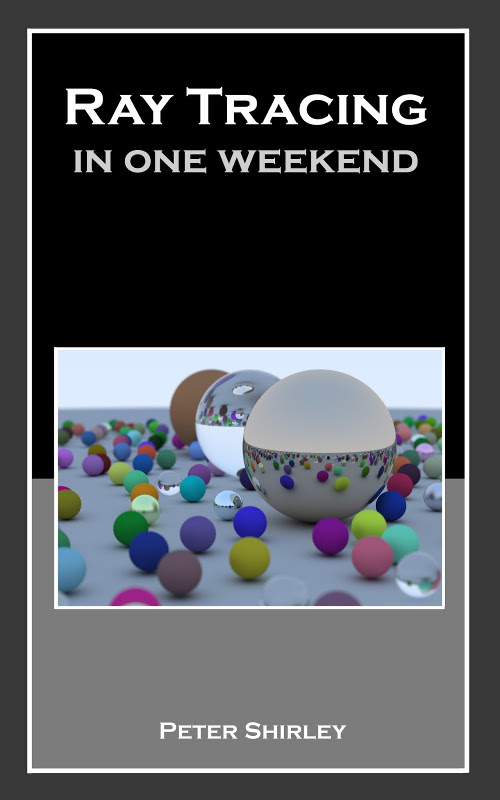 At the beginning of the book you will first have to set up your rendering infrastructure. All of the code makes no use of external libraries (except for one in the second book). That means having to build a 3D vector class, Rays, and other geometric goodies. Nim does come with it's own built-in 3D vector object, but I decided to forego using it so I could get the "full experience."
Now you might be saying "So how did you save renders then?" PPM. On standard out. Yeah, it's not my favourite image format either, but it got the job done and it is probably the simplest format to export without any extra libraries. And if you have a tool like ImageMagick converting it to something that people actually care about (e.g. PNG,) is trivial.
What's really nice about this book is how the author goes through step by step with you to build each component one at a time. I've had one too many tech books that I've slapped down $50 (or more) to only give me half-assed partial snippets and no walkthrough. Peter Shirley did a very good job of avoiding that. The code in this book had very few errors to none at all; a very great thing. With the amount of code in the book, I'd say you should be able to go through it in about three to six hours time.
I really wish I read this book before taking my course in Global Illumination. It would have made my life much easier and saved me a load of time and frustration.
Book 2 - Ray Tracing: the Next Week
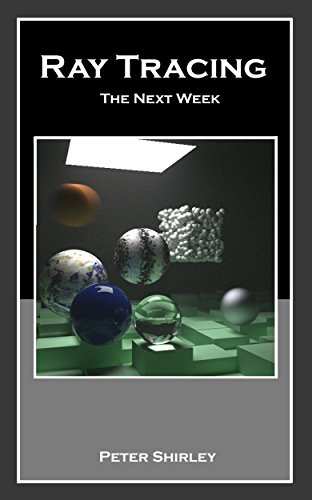 This is the book in the series that I learned the most from, but it is also the one that cost me the most agony and time.
A lot of that could contribute to the fact that I was porting the code to a language that I was new to, but this book did have it's share of errors and missteps. For example, there were a few times where Shirley forgot to mention to make a change to something; one of the things that drives me up the wall when reading a tech book. Despite all of this I was able to get through the book, but it took way more than a week (the titled lied to me,) and I had to manually trace things through in the original C++ repo more than I should have.
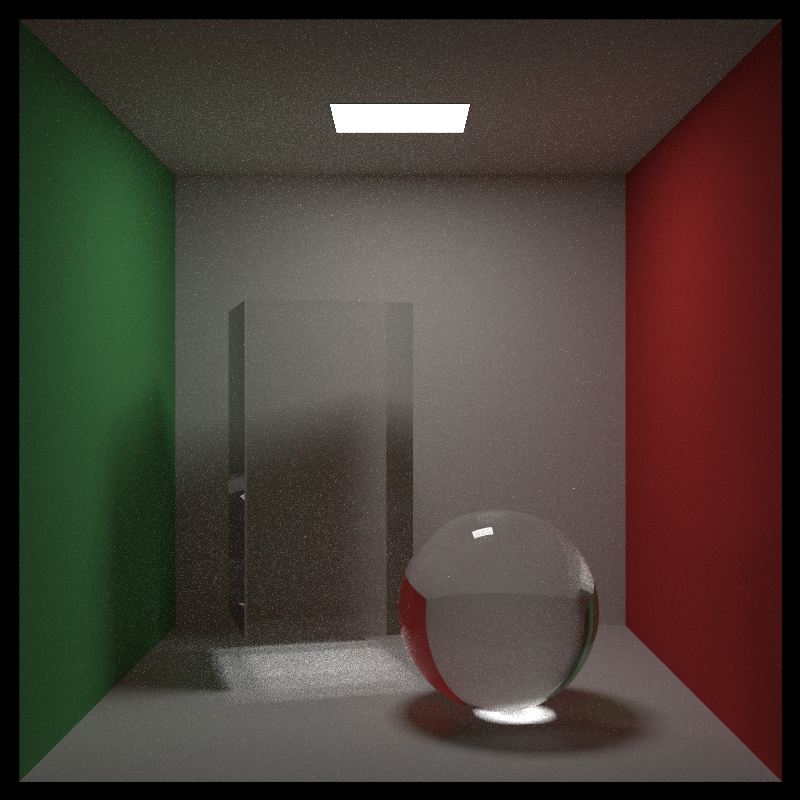
Annoyances aside, this book goes over things like texture mapping (on spheres only), perlin noise, interpolation, BVH trees, and other stuff. What's more exciting is that actual emissive lights get introduced. In the first book there wasn't really any lighting, it was all ambient and sun-like. Now, we had real lamps. There are also a lot more scenes constructed in this book than the last. Including that famous Cornell Box. There is an external library introduced, but luckily it's stb_image.h; one of those magical single header file libraries. Binding it to Nim was a sinch.
I'd only recommend reading this book if you really are interested in Ray Tracing beyond what was presented in the first.
Book 3 - Ray Tracing: The Rest Of Your Life
 This one ended up being a lot more math and theory based, as you refactor the Ray Tracer into a Monte Carlo one. And... that's really much it. Every single scene that is rendered is based around the Cornell Box. It would have been nice to have a little more diversity rather than replacing a box with a glass sphere or making one a mirror-like surface, but it doesn't take away from what's talked about.
What's really nice about this one is that it was a much quicker read for me than the second, less frustrating, the images rendered way faster, and ended up looking much better to boot. There was only one problem; in the final chapter the author did that thing again where he forgot to tell you to update something. I don't think it would have been so bad if I did the thing in C++ instead of Nim. I'll get to why later...
All in all, I would actually recommend this one over the second just a little bit more. Some of the things in it could fly over your head, but there were next to no errors in the book (just one).
Book Series As A Whole
As I said before, I wish I had a copy of the first book before going into my course where I had to build a Ray Tracer. It covers many of the necessary basics plus some extra fun things.
All of the issues that I bumped into in the second one were quite jarring. I've sent a laundry list of them to Peter Shirley. He's been very responsive to all of my emails and has fixed issues with his books in the past. Expecting him to clean them up during the Thanksgiving-Christmas-Hanukkah-Kwanzaa-Festivus-New Years blitz (a.k.a. November & December) is not a fair demand, but he should eventually. Once these get fixed up I think it will be a much stronger series.
Except for the errors, the source was of a good quality. It was mostly clean, readable, and simple. The only thing that I didn't like was the organization of the code. I know you get what you pay for ($3) but it wasn't really that well structured. It made the software engineer in me hurt a little. The code was also provided as one big lump in a GitHub repo. Other tech books I've read have been nice enough to divide up the progress from each chapter in their own separate folder. This would have been good to do instead.
I'm a little saddened this didn't go over other things like the BRDF or a bit of ray marching. It would have been better to have more in the third book than only a Monte Carlo renderer. I also don't think the title of the last book is really accurate if you choose to do more Ray Tracing after reading it. This book series should not be treated as a replacement for a university course; I learned a lot more about ray tracing and computer graphics at school.
With these negatives, I think the positives out way them and make the series worth the money to pay for it.
What it was like doing this in Nim
There always seems to be a relevant XKCD for every situation. In the realm of compiled languages Nim really made me feel like I was flying again.
As I said before, I did this book in Nim as an excuse to learn the language better. I've made a few toys with Nim prior, but I felt working on a larger (iterative) project would force me better understand the language. At the end, I did learn a lot more..
Translating between C++ and Nim wasn't that difficult at all. The book's source wasn't complexly constructed in areas of OOP, and Nim's OOP functionality is still fairly basic, so there was almost a one to one correspondence with what I would have to write. When there was a C++ class, I would typically turn that into a type CLASS_NAME = ref object of RootObj. It would hit most of my needs but one time it came back to bite me in the butt. Looking up witch Nim proc to use in place was something a pain, as Nim's documentation isn't the best at the moment.
Things always felt very fluid and fun for me. It felt a lot like I was writing Python code that was type checked. The operator overloading is also some the easiest I've seen in any language. And because of having to use stb_image.h I got a taste of how to work with the foreign function interface. Heck, I even ended up doing a proper wrapper of the library.
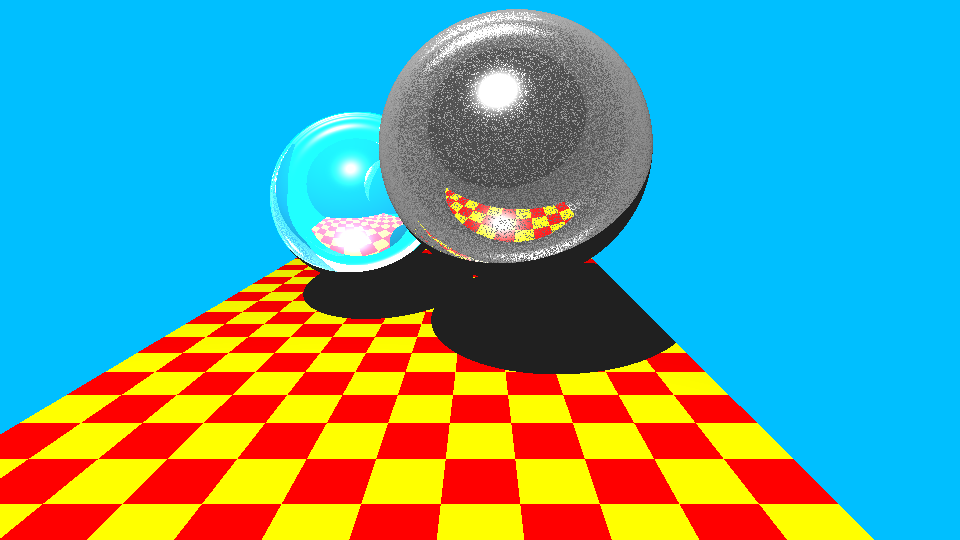
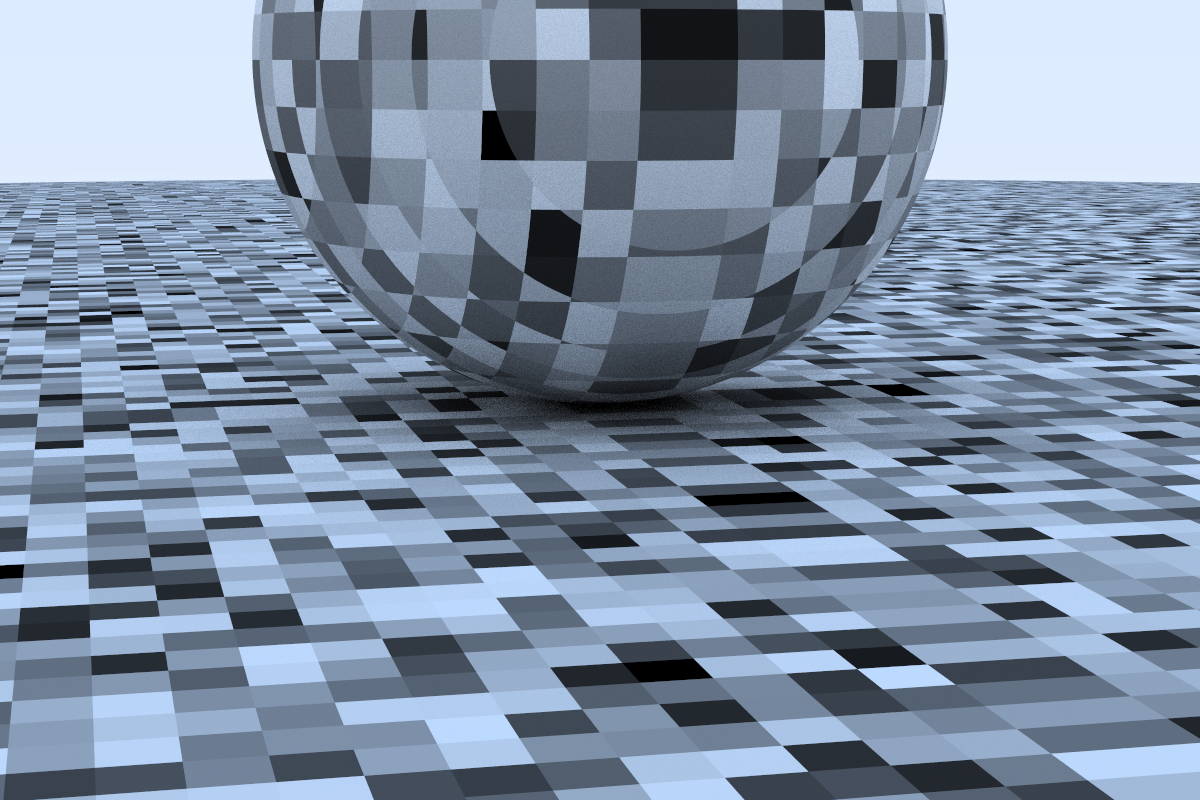
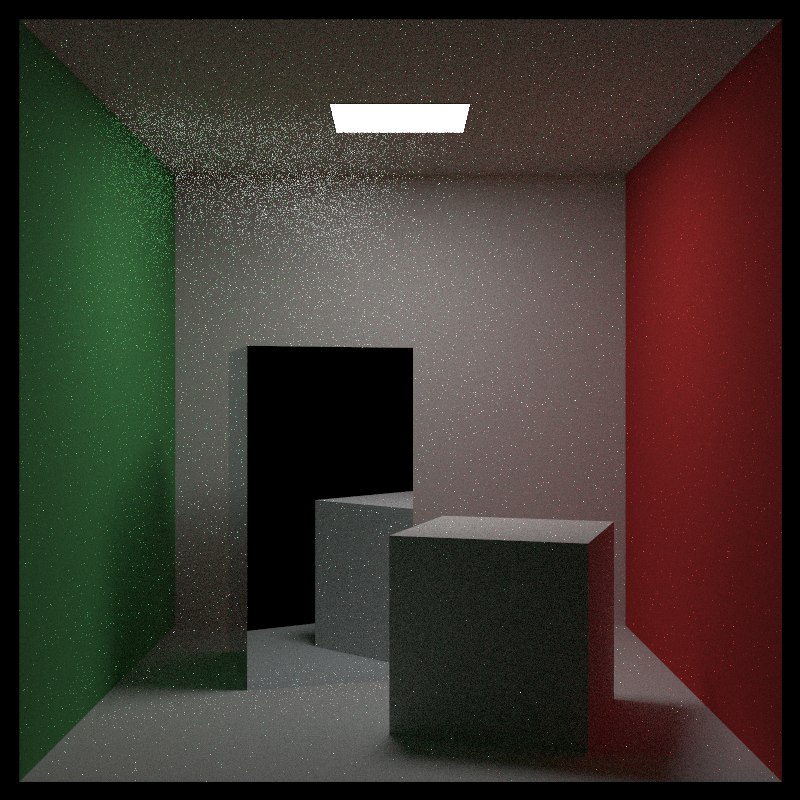
So how that ref object of RootObj got me... I would translate all of the C++ classes using this. That would create reference counted pointer to an custom object I defined. Upon object creation, which would be stored in dynamic memory. When I was first working on the Cornell Box I got this:
Yeah, that's pretty bizarre. That back box is off to the right (through the wall), yet it's shadow and diffuse reflections are on the room walls and floor. After pulling my hair out form running through the code I finally figured out that ref object of RootObj was what perpetrated it (or how I used it), along with this snippet:
method hit*(ry: rotate_y, r: ray, t_min, t_max: float, rec: var hit_record): bool=
  # I thought this was copying the vec3 data, but it wasn't.  It was copying the pointer...
  var
    origin = r.origin()
    direction = r.direction()

  # origin and direction are modified after this which caused the issue...
I wasn't creating a copy of the 3D vector, I was modifying the original vector… After that I changed that vector class over to a simple object.
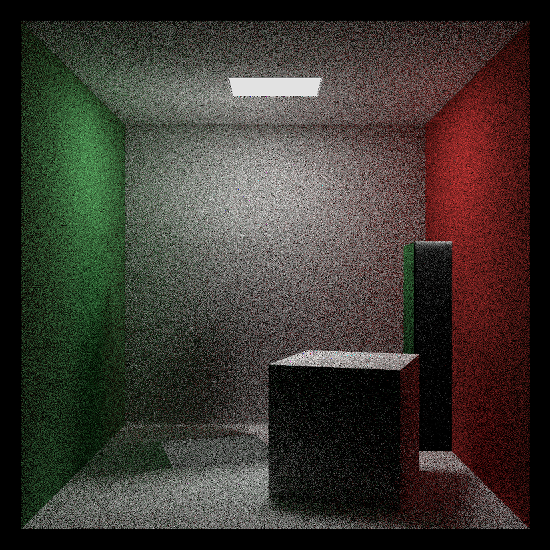
Another problem I had with Nim is that it doesn't yell at me as much as C++ does. When I was working on the last book, my renders were coming out like this:
"How the heck is that glass sphere turning into a black hole?" went through my mind. This also made me spend too much time chasing the errors down in the wrong places. Partially, this issue stemmed from Peter Shirley not reminding me in that last chapter to update the dielectric::scatter() method. But when I changed the prototype for the base method material::scatter(), Nim didn't yell at me to fix the child methods too. It just used the base method instead, which would return black. When you change a base method's prototype in C++ the compiler will remind you to change all the children too. For once, I wish I was being screamed at.
There is also some other odd behavior I want to look further into too. In the second book we built a BVH Tree hierarchy to store the scene info, as to make the ray collisions much faster than checking each object one by one. Storing the hittable objects in a sequential list was faster than searching the BVH Tree. It could be my implementation of a bounding volume hierarchy, but I'm sure it's functionally correct.
As for the performance of the Ray Tracer. It's not as fast as the C++ one it was ported from, though it is still pretty good. If I were to have written this in Python (what Nim resembles), I think the images would still be rendering well into my 80s. The port that I have is definitely not the most riced thing possible. There's probably a ton of other optimizations that can be made. But here are some comparisons:
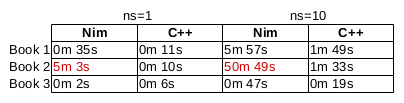
Commit was: "fd77499840b4a93441b4c9d772258da85fecc265". Resolution was 1280x800. "ns," stands for number of Rays/Samples per pixel. All were done on a Desktop Intel i5 machine, single core w/ no threading. The Linux "time," utility was used to benchmark. I think the performance slowdown with book 2's Nim implementation has something to do with the BVH node. I'll be investigating it and hopefully fixing it.
Nim is still very young so I don't think it's fair to be overly critical, and I'm also very new to the language myself. I will continue to do more things in Nim as I really like it.
If you want to learn more about Nim here is the website and here is a good place to start. You can find the Nim Ray Tracer here (GitHub mirror). And if you're interested in the books, here are their Amazon pages: