About two weeks ago, I decided to revisit Random Art once more. This time around, I wanted to put it in a browser, so I made a WebGL port. You can write equations in a scheme-like syntax, or generate your own. I was going to use Nim at first, but I opted to try out TypeScript instead. I've heard about this new JavaScript replacement language for quite a bit and I thought it was time to give it a go. It's not bad IMO, but I'm not ready yet to fully commit to it.
In other news, about a month ago I started a daily Japanese practice blog (毎日日本語練習ブログ). I call it 日本語ベン強 (nihongo-benkyou). It's a pun; you won't get it unless you know some of the language. Since February of 2018, I've started taking Japanese classes. Foreign languages have always been an affinity of mine, and I was looking for a new hobby that's not related to tech. I created the blog so I could get some practice writing Japanese. Even if it's not the most correct. So far it's been fun.
As of the past year Glitchet has been one of my favorite parts of the week. It's a mini newsletter that covers all sort of futurism and computer arts thing that I'm interested in. A While back (seven months actually), I contacted the curator of webzine and told him he should do an article on Random Art. I didn't hear back from him until a few days ago.
He asked me if I was willing to write a piece on how it works. Everything was fresh in my mind from my Nim port of Random Art, so I agreed. Over the weekend I came up with this. It gives you a simple overview of how the process works and where these pretty pictures come from. If you don't understand anything, I'm sure you'll be able to grasp something at least.
Edit (Jan 30th, 2017): I written an article on how Random Art works. You can read it here.
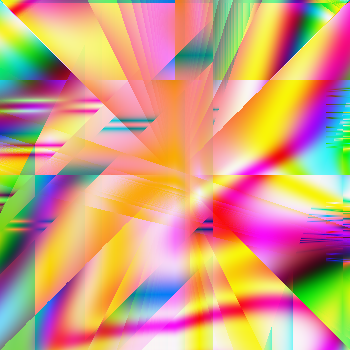
Have you ever heard of Random Art before? If you don't know what it is, the short and skinny is that it's a program that will generate some really stunning images using a randomly generated math equation. That's what the image above was made with. The original program was written by Andrej Bauer. The Random Art website uses an OCaml program that been compiled to JavaScript. Unfortunately the source for that is not publicly posted (which is a shame because it makes some of the best pictures), but a simple Python implement is available. Going off from that, I decided it port it over to Nim and add support for rending with OpenGL (and make a few other changes I see fit).
Well... actually I ported that to C++ (& Qt) first about a year ago, then I did another port over to C# four months later. The C# one was a little more interesting because it was a distributed rendering system leveraging cloud services and RabbitMQ; I ended up using it on a film I was working on. Pretty cool. Those... I don't really feel comfortable sharing the source to right now. But I'll give you a Nim implementation instead. : P
You can find the application over here on GitLab (or GitHub if you prefer it). To compile the thing, your going to need GLFW installed as well. It can run into two modes: CPU bounding rendering and GPU (via OpenGL). There is a lot more info the in the Readme, but here is the usage message:
Usage:
  ./random_art [input] [options..]

  input : a path to an equation file, or provide `stdin` to read input
          from standard input

  Options:
  -r, --renderer : cpu | opengl
                   render on the CPU or with a GPU (using OpenGL)
  -s, --size     : <width>x<height>
                   the dimension of the render, must be a positive int
  -b, --bounds   : <xMin>,<xMax>,<yMin>,<yMax>
                   the bounds to use to render, must be a float
  -o, --output   : <filename>.png
                   the file to save the render as, must end with .png
If you run the application without providing an equation, it will think up one for you. Writing your own equations has this Scheme-like syntax. It's pretty easy to understand, but also to parse. The equation below makes the image to the right.
(mul
  (var y)
  (mod
    (sum
      (var x)
      (var y)
    )
    (const 1 0.7 -0.1 0.95)
  )
)
I plan on working on this some more down the road. You can already see some of my changes showing up (e.g. an alpha value). I'll keep you guys posted. Once again, the code is available here (GitHub mirror).
Fractals have been something that I've found really intriguing since high school, though, I've never taken too much of a stab at trying to generate them. For a few assignments back in my CS1 class we had to use Python and the Turtle package to draw some. These were done mainly to teach the concepts of recursion, state, and using geometry in computer programs; pretty basic stuff. I imagine that almost everyone has had to use Turtle at some point in their CS coursework, and incidentally, has drawn a fractal.
Last year I was taking a course in Global Illumination. We had to do two projects over the semester. Write a ray tracer (throughout the weeks) and explore a graphics related topic of your choosing. For that second one, some students chose to look into ray marching or real time raytracing. I wanted to look at fractals some more.
After talking with one of my friends, he told me to look up something called "L-Systems." The full name is "Lindenmayer System," and it's the magic behind fractal generation. In a nutshell, the idea behind it is to create a grammar (yeah, one of the CS theory ones) and give each letter (or variable) an action (e.g. "draw line forward 10 units," or "rotate 45 degrees clockwise,"). The simplest example I can think of is the Cantor Set on the L-System wiki page.
Even though I was already making a 3D graphics program for the class, I decided writing a Blender script would be the best. Here are some of my reasons why:
- All the tools, libraries, and rendering infrastructure is already there. I only need to focus on the tree logic
- My Ray Tracer has a .obj file loader, so all I need to do is export it from Blender as a Wavefront object
- On top of it too, I was also able to export it as a .stl, load it into slic3r, and materialise it on my 3D printer. Pretty cool!
- Blender is widely used and some others might find my script useful
So working in Blender there isn't a 3D Turtle object you can rely on to do the drawing. But instead, you have to work with Matrices. The basic idea of what you need to do is this:
- Chain a bunch of matrices (appending and popping to/from the end of a list works well). Most of what you'll need will come from
Matrix.Translation()andMatrix.Rotation(). These are equivalent of the Turtle movement commandsforward()andleft()/right()- Make sure you chose one axis as your "forward," direction. For my script, I always made translations in the Z+ direction.
- Compute the result of the matrix chain, by taking the leftmost (first) matrix, then multiply it by it's neighbor to the right. Rinse and repeat until you have one matrix left
- Create a new 3D mesh (e.g. via
bpy.ops.mesh.primitive_cylinder_add()) - Blender will consider the newly created mesh as the "currently active object." So multiply that new mesh's world matrix by the computed matrix chain:
bpy.context.active_object.matrix_world *= computed_matrix_chain
- And voila! It should be in the location and orientation you want it. From here you can go to a deeper level of the fractal or move back up. Don't forgot to pop those matrices off the end of your chain!
If you're still a little bit confused, take a look at the git repo over here. All of the necessary code is in l-system_tree.py. It's pretty simple and you should be able to follow along. My L-System grammar is quite uncomplicated:
- A → BCDE
- B → A
- C → A
- D → A
- E → A
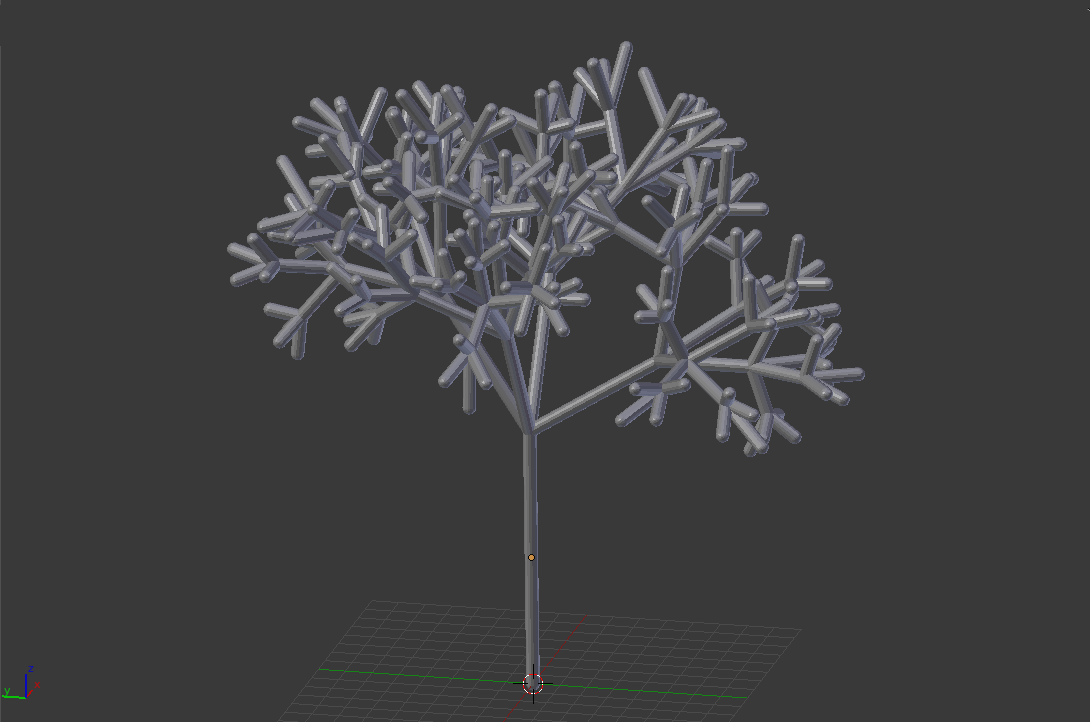
"A," also means "draw a branch," whereas "B," "C," "D," and "E," mean rotate about an axis (each one is different). Each variable also checks the current depth to make sure that it isn't going on forever, though only "A," really needs to check for that.
There are a few other configuration options that I threw in (e.g. TWIST) so I could make some different looking trees. Below is an example of one of the trees that I made with VARIATION_MODE turned on; it gives the tree a much more natural looking feel.